
|
Creating Gritty Black and White Portraits
In the quest to improve my photography skills (does that ever end?), I've been looking at the work of others I admire. I've been looking at portraits in particular and one of the techniques I've been interested in learning is how to create gritty, dark, black and white portraits. I figured that before I try this with photos of anyone else, I better experiment on my own photo first. What follows is a detailed step-by-step on exactly how I created this self-portrait. I have to admit, at first I struggled to figure out what technique would work best. I experimented on my own with multi-image HDR, single-image HDR, high structure, and various editing combinations. When I came across a photographer that had work very close to what I wanted to create, I emailed my friend Bill Conway asking him his opinion on how he thought the images were created. Bill pointed me to this article by Scott Kelby. I read through it and although the end result of the technique wasn't exactly what I wanted, it was a great place to start. So that's where we'll begin. Tools Used
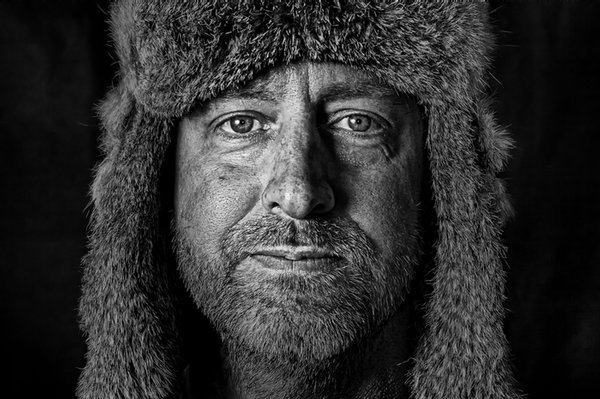
The Original Photo
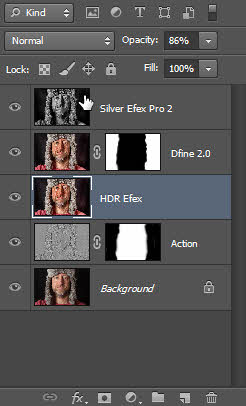
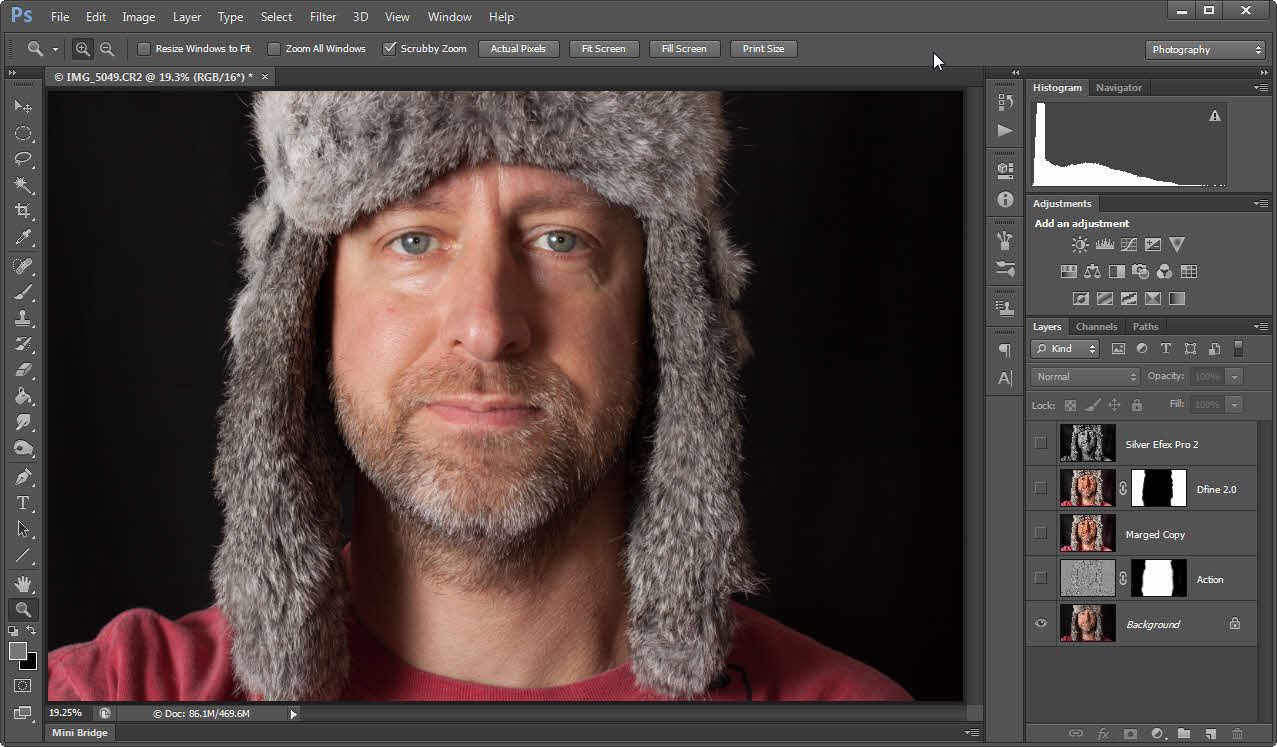
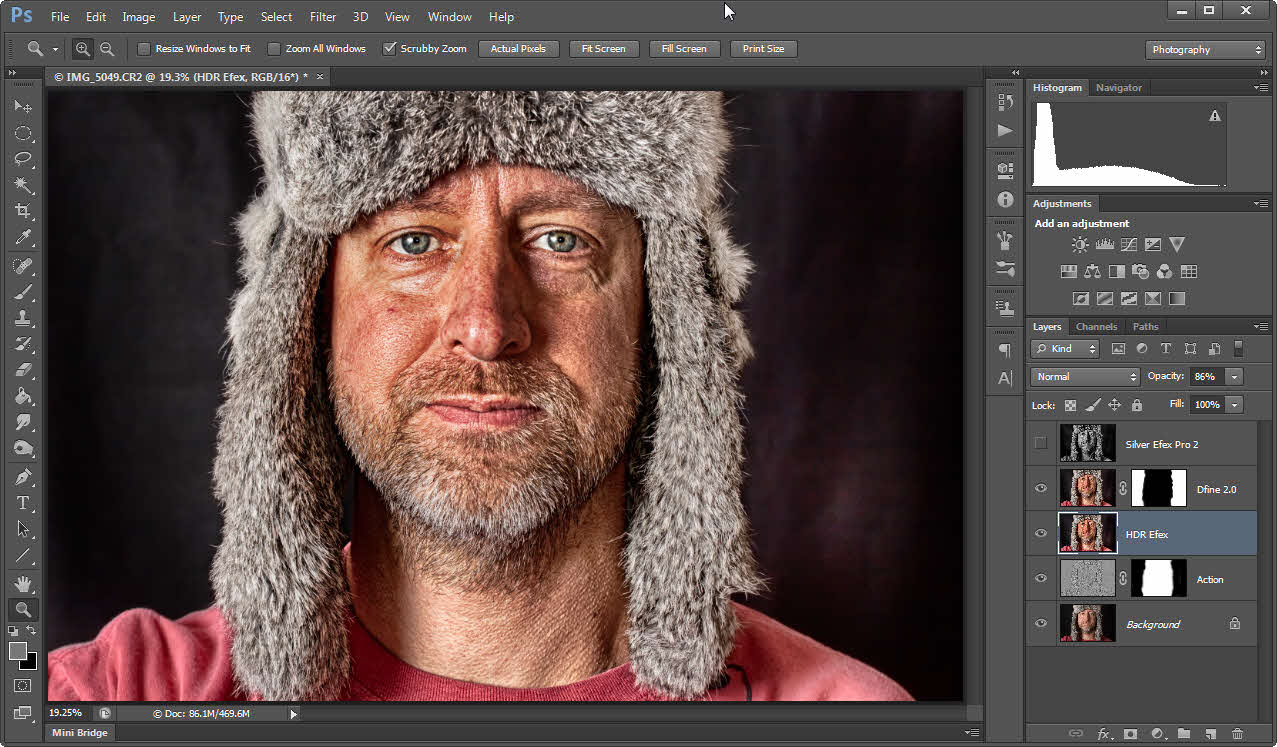
The ProcessThe majority of this process is done in Photoshop. Here's what my final layering looks like so you can see where we're headed. I'll show how each layer was created in the steps below.
Layer 1We'll start from the bottom layer and work our way up. The first thing I did was to edit the RAW image in Photoshop. Select the photo in Lightroom and hit CTRL-E to open the photo. This is what the original, unedited image looks like:
Layer 2The next step is to create the first high contrast layer. This is done entirely by following the instructions in the Scott Kelby article linked above. I recorded the instructions from that article into a Photoshop action. Download the Photoshop Action if you want a head start. If you aren't sure how to install Photoshop Actions, check this article. Here's the results of the first step:
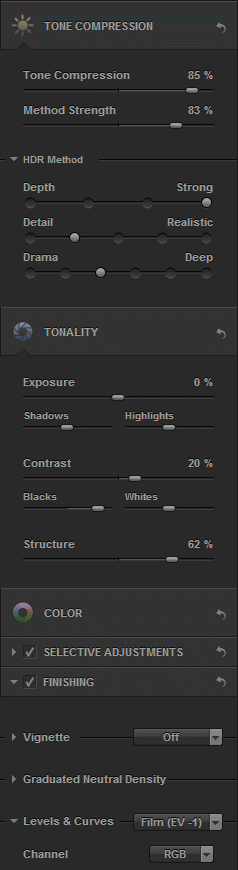
You can see that the steps in that article (same as the PS Action) give quite a boost in local contrasts. The textures int the skin, beard, and hat fur really jump. As mentioned in the article, this process does NOT work well on out of focus areas of the shot. As a result, the action may create halos around some edges and it did in this case. That's why I have a mask applied to this layer. Look in the layers view and you'll see I have the left and right side of the image masked out to show the original background, leaving the technique only applied to the body and hat. Layer 3Next, create a merged copy of the image (SHIFT-CTRL-ALT-E) and open that new layer in HDR Efex 2. Below are the settings I used in HDR Efex. Panels that are collapsed did not have any changes. You can recreate the exact effect using the settings shown or just use those as a starting point to find your own preferences.
And if you're familiar with Nik's tools, you'll know a lot of power and flexibility comes from using control points. I used a couple control points to tweak the settings around the fur in the hat and to darken the background. I also set this layer's apacity to 86% to slightly soften the results and blend back in layer 2. Results of processing in HDR Efex are shown below:
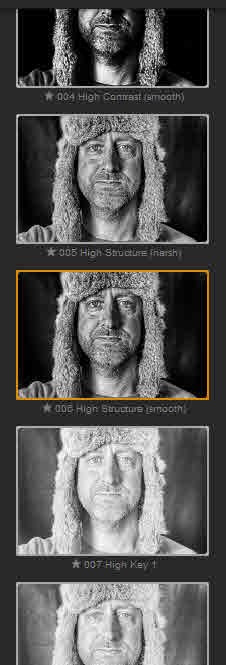
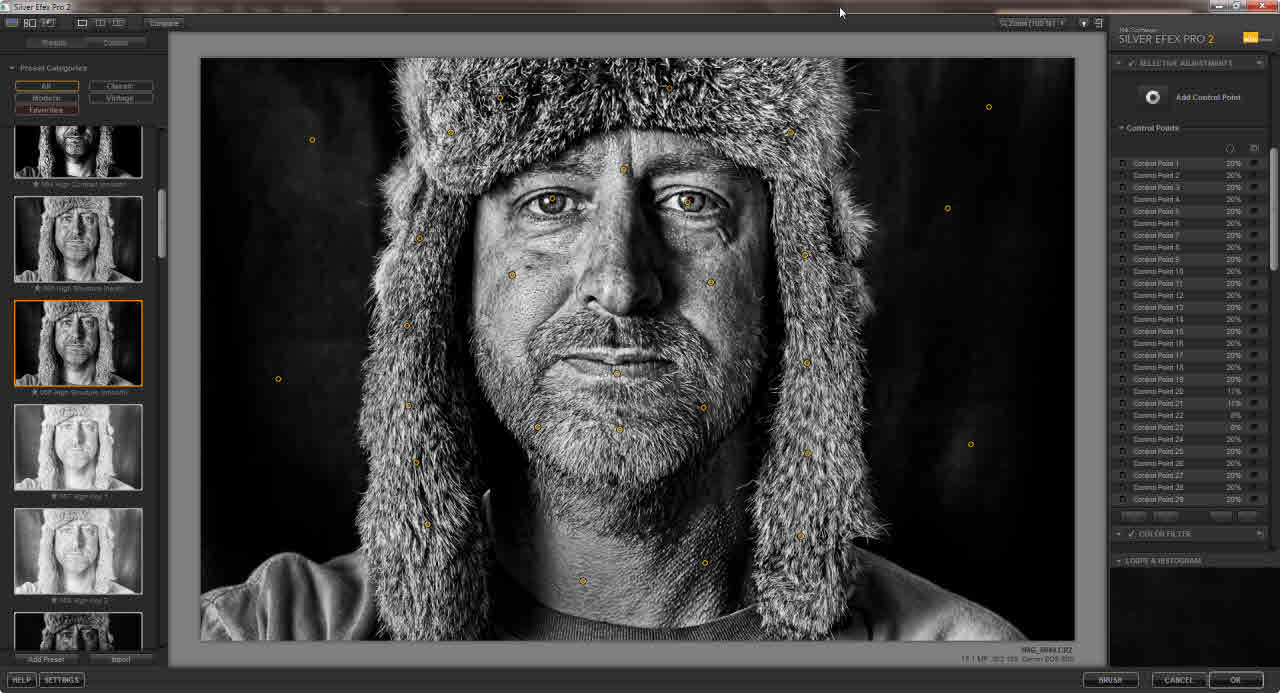
Layer 4As you saw, the HDR step boosts the gritty, dirty factor quite a bit. Unfortunately I shot this with such a dark background that the HDR processing really brought out the noise in the dark areas as well. The result was quite distracting. I wanted to get rid of that so I opened it in Nik's Dfine (which created a new layer), but you could use just about any other noise reduction process. Results are below: I didn't want the noise reduction applied to the face or hat, only the background. So the layer with reduced noise was masked, as you can see in the layers section on the bottom right of the image above. Layer 5Now comes some of the tricky work...converting to black and white. This is a great step to play with different settings to come up with your own style and mood. How you process for B&W may depend a lot on the original image, how it was lit, how the subject looks, etc. For this image, I started with the preset for High Structure (smooth) but feel free to explore the others as starting points. See below:
After selecting that preset, I tweaked it a bit and used a bunch of control points. I primarily used them to darken the background, then added a bunch of neutral control points to preserve the face and hat as-is. If you didn't know, adding a new control point in an area resets that area back to the original, untouched image, effectively cancelling out the effect of other nearby control points. The final 2 control points were on the eyes to lighten the shadows and brighten just a touch. Here's a screen shot with all 29 controls points shown:
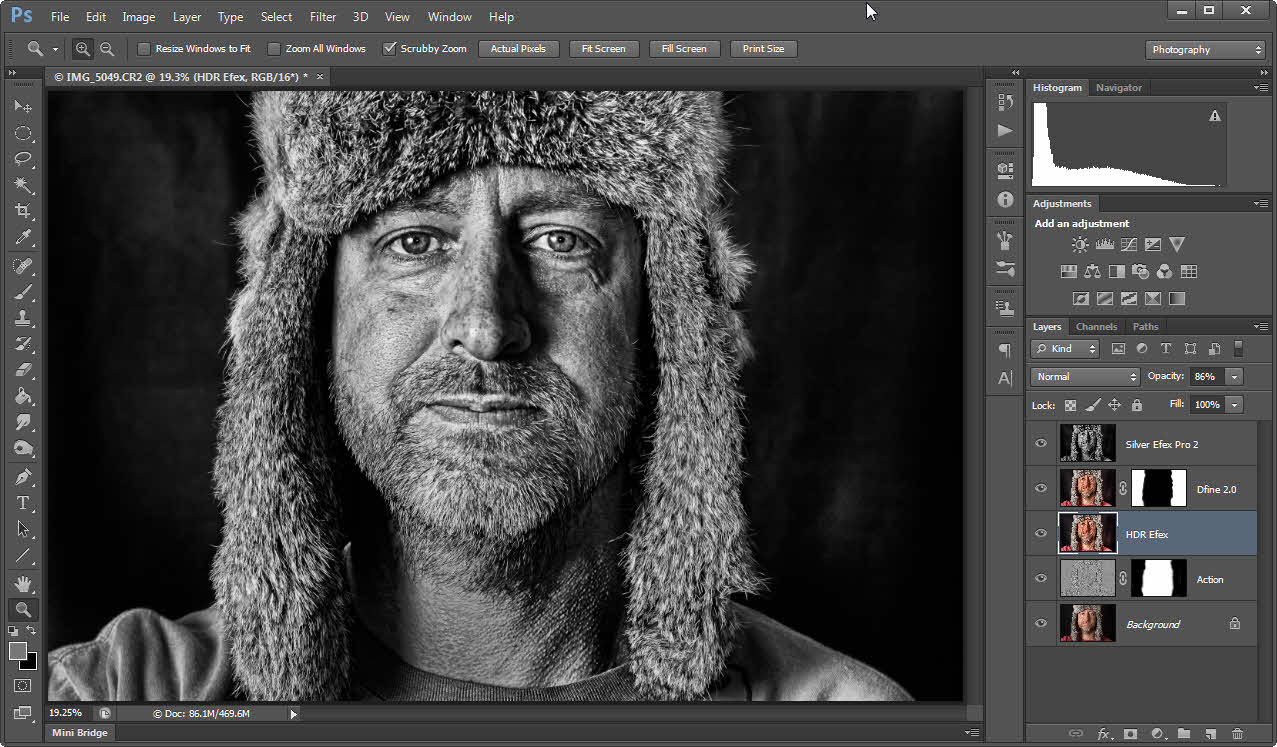
And here are the results of the final layer in Photoshop.
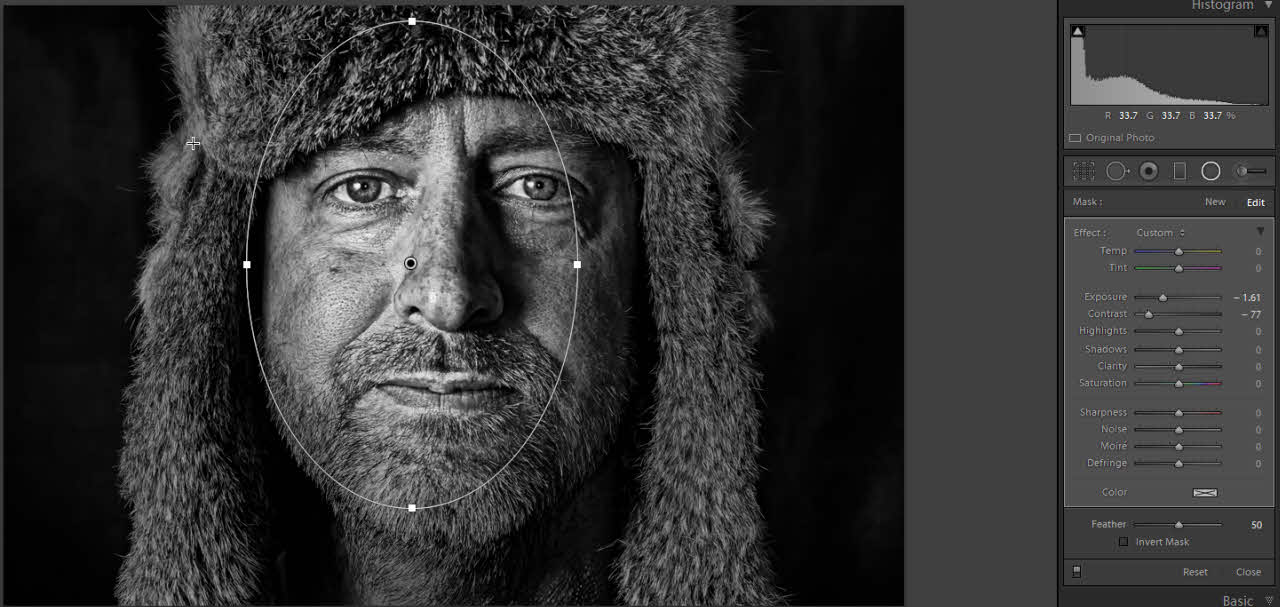
Back to LightroomI saved this image (with the layers) and returned to Lightroom. Here is where I did the final 3 touches. Final Fix 1 - Crop itThe original shot was too distracting at the bottom. I tried a vignette but it wasn't the right effect, at least not for what I wanted. Since this is a portrait that is meant to draw attention to all the gritty details, it was best to crop it close and just remove the entire bottom of the shot Final Fix 2 - Radial GradientThere is a tremendous amount of detail in the hat, skin, and beard. I wanted this shot to push the viewer to focus on the eyes and the surrounding detail was just too overwhelming. The fix was to add a radial gradient filter (new feature in Lightroom 5) to preserve the eyes and lighter part of the face. The parts there weren't preserved I reduced the contrast a lot and dropped the exposure about 1½ stops. The image below shows the filter location with settings on the right: Final Fix 3 - Adjustment Brush on the EyesA very, very slight change was done on just the eyes to lighten the shadows. Here are the final before/after views in Lightroom: Final ResultsAs you can see, it took quite a few steps to create the vision I had in my head but I'm happy with the results. If you try this kind of effect on your own I would encourage you to play with the settings at each step along the way. Very slight adjustments in blending, HDR, and B&W processing can be critical to bringing a particular photo to life the way you want it. Another technique to use is custom dodge and burn in Photoshop. You can do this non-destructively in Photoshop using a 50% gray layer in Overlay blend mode, then paint in the dodge and burn effects you want on the gray layer. You can also use the adjustment brush in Lightroom to achieve a similar non-destructive effect as well. I hope this blog helped you learn something new and gave you some ideas on how to get creative with your portraits. If it does, I'd love to see what you come up with! If you want to share the results of your own efforts, you can follow me on Google+, Facebook, or Flickr.
|
Topic List
adventures
business
calendar
copyright
digital editing
equipment
event
facebook
free
google
internet
lightroom
microsoft
opinion
philosophy
photoclub
photography
photoshop
poetry
presentation
promotion
software
technique
technology
Search
Posts By Date
Recent Posts
Latest Photos
|


katherine
3/21/15
8:06 AM
Thanks